|
|
Step by Step Instructions for the Invisible Quilt Hanger | |
|
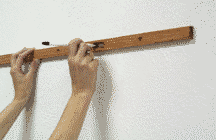
Step 2 - Mark the screws
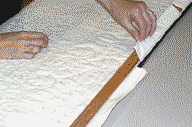
Fig. 3 - Arrange the flaps
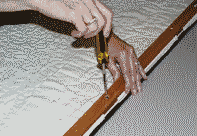
Fig. 4 - Screw Together
Fig. 5 - Slide on to screws
|
How do I hang my quilt?
Step
1. Take the hanger apart by
unscrewing the screws. Step
2. Take the hanger piece that
has the long holes in it and place it on the wall where you want to hang
the quilt. (Make sure the
quilt will fit in this place and hang at eye-level). Step 3. Place the quilt on a table, face down. Place the strip of material that you have sewn to the binding, over the second hanger piece making sure the small silver discs are face down on the quilt. Step
4.
Set
the 1st piece of the hanger on top of the strip of material.
Mark where the screw holes will be & pierce the material so the
screws will easily go in. Screw
the two pieces of the hanger together making sure the material is pulled
tautly. Step
5. Hang the quilt hanger on
the screws or nails placed in the wall. Step 6. Enjoy your quilt. |
Sunset
Bluff Creations P.O. Box 244 Azle, Texas 76098-0244
Designed by Sierra International

